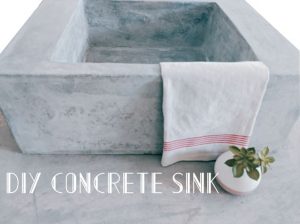
If you’re like us then you probably were in the same boat as us and didn’t want to purchase a sink. Some of you may have wanted to purchase a sink, but you wanted a unique sink that would really make a statement in your area. We searched and searched and found a concrete sink on pottery barn. It was perfect and is exactly what we wanted in our laundry room. Then we took a look at the price and decided $2000+ dollars was too much for our taste. Thus begins our challenge to take on this DIY concrete sink. While this was a challenging DIY project, it can easily be tackled by the average DIYer and can be accomplished for less than $150.
Items you will need for this tutorial:
Malamine Board
Water proof silicone caulking
Joint Compound
Countertop Epoxy Glaze Coating
SC Johnson Paste wax
QUIKRETE Countertop 80-lb High Strength Concrete Mix
Quikrete Concrete Cure And Seal
Wire mesh (we used 23-GA HARDWARE CLOTH from Lowes)
1/2″ insulation foam board or insulation styrofoam
Electric Hand sander (optional)
120 grit sandpaper
STEPS:
Step 1: Measure the size you want the sink to be and cut out the sink basin inner mold and glue the foam pieces together. Our insert was 15″ x 17″ x 7″. We cut out rectangle pieces on the foam insulation and glued them together with a glue stick or spray glue we had laying around the house. Once they are glued use an exacto knife or fine saw blade to shave off imperfections and smooth out the box. You will also want to make sure you put a small piece in the middle to create a spot for the drain.
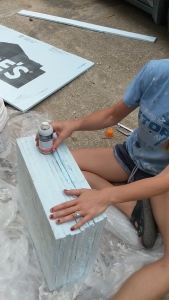
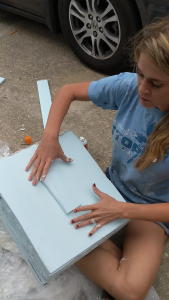
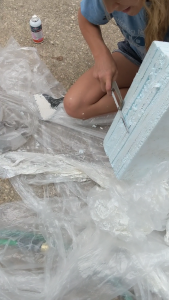
Step 2: Next take some joint compound and spread it evenly around the entire surface area of the inner mold. Then wait for it to dry and move to step 3.

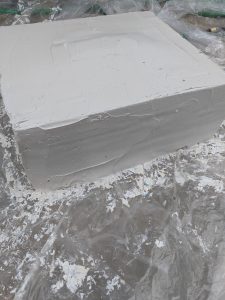
Step 3: Once the joint compound is dry, sand it down either by hand or with an electric sander. Our lesson learned is that you want to be careful to not put the first layer of the compound on too thick. If it is too thick then it may crack and using the electric sander could knock some dry joint compound pieces off (we had to do some patching). So we recommend you either put a thin first layer or sand it by hand.

Step 4: Repeat Step 2 and 3 as needed to achieve a smooth uniform surface on the inner mold. This process took a week for us (mostly due to the fact that our first layer was too thick)
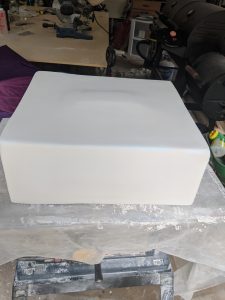
Step 5: Cover the inner mold with Countertop Epoxy Glaze Coating to create a smooth slick finish. This will take about a day to fully dry.
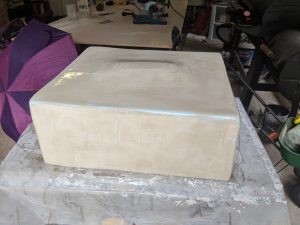
Step 6: (which can also be step 1 depending on how you start): Measure the size of your sink and cut out the Malamime board to create a box for the outer mold. Our box ended up being 18.5″ x 26″ x 9.5″ Screw the boards together into your box shape. This will make it easier to take off the mold once the curing is complete.
Step 7: Grab your finished inner mold and position it on the outer mold box. once positioned find a cylindrical shape that matches your sink drain. We used an old children’s cough medicine bottle which was approximately 1-5/8″ . We recommend you use a glass one, this makes it easier to chip out when the curing process is complete. Once you have everything in place, use the waterproof silicone caulking to seal around the inner edges to include the bottle of the drain hole.
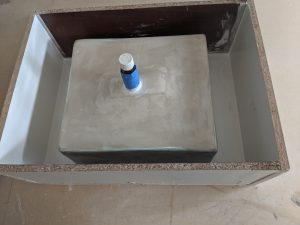
Step 8: Once the caulking is dry then rub the SC Johnson Paste Wax around the inside of the inner mold and inner malamine board. This gives an extra water proof layer so the concrete doesn’t stick to any of the boards.
Step 9: Next grab your mesh wire and create some re-enforcement for concrete. We measured the width, depth, and length and bent it into place.
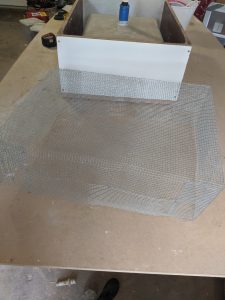
Step 10: Grab you bags of countertop mix and begin mixing. Since this mold is upside down you will want the first layer to be packed in tight to ensure that no air pockets or discontinuities enter into the concrete upon curing. We recommend you mix the powder in a separate container to ensure the aggregate fully mixes with the powder mix. We used a hammer drill to mix the counter top mix and even our oldest daughter assisted in the process!

Be careful to not pour too much at once or your will burn out your drill. Slowly add it in and transfer to another container, then mix and repeat the process back and forth until you have paste like substance to pack on the first layer. you can also use a cement mixer if you have one handy (for best mixing results this is recommended). We still wanted to save money, so we utilized what we had on hand.
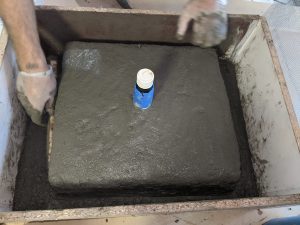
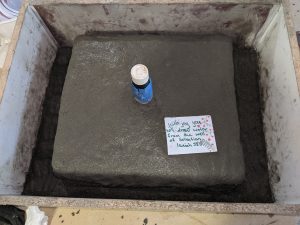
For an extra piece of fun we added a good verse from Isaiah to always remember that God brings true salvation to those who believe. Isaiah 12:3 – “With joy you will draw water from the well of salvation” We literally added this while we were pouring the concrete mix so we quoted the wrong verse on the paper because we were rushing. Although Isaiah 58:11 is also a really good verse as well : )
Step 11: Once the packing layer is complete then stir the counter top mix until it is a cake batter consistency. Then pour the mixture in and use a hammer to tap the edges to minimize air pockets. We also used hand sanders against the outside of the box mold which worked great as well. Once you reach the top, take your wire mesh and wiggle it into place. Once complete, pour the rest of the mix over it.

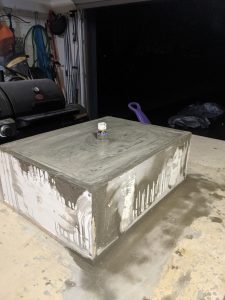
Step 12: Now wait until the counter top mix cures, then remove the outer mold box and then cut out the inner mold (utilizing foam makes this process much easier than wood). This mix takes 48-72 to cure to 2000 psi, 7 days for 4000 psi, and 28 days to 6000 psi. Be sure to follow directions on the bag. We removed the molds around 60 hours cure time.
Step 13: Utilize an electric hand sander (with 120 grit sandpaper) to smooth it up and remove any deformities. Next, stir more counter top mix together and do some touch up to ensure all sides are smooth.
Step 14: Once the touch up is dry, then use the hand sander again with 120 grit and repeat the process as needed.
Step 15: For extra smooth results, use a water variable speed stone/concrete polisher with concrete sanding pads. Start at 50 grit and work your way up until you reach the desired smoothness (typically 1000 grit for concrete). If you don’t have a water variable speed polisher then utilize a grinder (with grinder pads) and spray water on the concrete. Be careful to not get too much water on the grinder or you could accidentally get it into the grinder and it could shock you. Some people shy away from using a grinder because it’s a consistent speed and the polishing pads could easily get torn on the concrete. This is true if you use the lower grit with small amounts of water. However if you use a hand held sander first and then use the grinder with a 500 to 1000 grit pad (add water with a spray bottle) then there is no worry for scuffing or the grinder pads chipping. Worked great for us!
Step 16: Use a concrete sealer to finish it off ( we used Quikrete Concrete Cure And Seal). Utilize a paint brush or small roller for this step. It’ll spread on white, but don’t worry, it dries clear and keeps the concrete the same color.
We thoroughly enjoyed this DIY project and hope that this helps you!
Note: Depending on the size of you sink, the concrete will be really heavy, so make sure you don’t hurt yourself when moving yours to the desired location.
